Backpacking the Kalalau Trail - Most Efficient Guide

DISCLAIMER: This land is sacred to the Hawaiian people and must be treated with the utmost respect and reverence. As you embark on your journey please honor the land and be aware that the trail can be extremely dangerous.
The Kalalau Trail is a 22-mile out-and-back trek to one of the most beautiful beaches in the world. I hiked it in April of 2022 and June of 2024, so in this guide I will prepare you to make the most out of your trek!

Overview

BACKPACKING ETIQUETTE
Leave No Trace: always "pack it in, pack it out" and only use biodegradable soaps in freshwater sources. Be sure you bring all trash out with you, there are no services at the beach to discard trash and we want to keep these sacred places BEAUTIFUL.
STAY on the designated trail to avoid trail erosion
Respect wildlife: DO NOT feed, securely store your food and observe from a distance
Yield to others: uphill hikers have the right away
Permits
Location: Napali Coast State Wilderness Park
Permit Site ID: Kalalau
Permits are required to hike and camp beyond the Hanakāpī‘ai stream at mile 2 and are available 90 days before the desired start date. In my experience, permits sell out almost immediately so I would create a login ahead of time and be logged into the permit website at the time they are released (90 days prior at midnight HST).
The rainy season (November to March) will have better odds of getting a permit however trail conditions could be dangerous and you risk trail closures.
Maximum 4 persons allowed on the permit and 1-5 days max allowed for a reservation
click here for the permit website
click here for a detailed weather forecast for Haena State Park

Kalalau Trail permit website
Packing List
Beyond general backpacking essentials, I have compiled some Kalalau-specific packing items
NO sleeping bag- instead I brought this mummy liner (I’ve also used a thicker towel but that takes up more space & is heavier). Backpacking in April & June was warm at night and I never got cold just using the liner (I also run warm so if you’re always cold, consider bringing more).
Swimsuit
Lightweight beach coverup
Beach hat
Daypack


Kauai Accommodations & Logistics
After completing this trail twice, I believe the most efficient and cost-effective accommodations are to arrive at least 1 day before the start of your trip. There is no need to rent a car (unless you’re looking to extend your trip to explore other parts of Kauai). Parking a rental car at the trailhead incurs additional costs for a vehicle you will not be using at that time. To save the most money, you can take the public bus from Lihue airport or town (about $1/person from the airport to Hanalei Bay) and stay at the Hanalei Inn. The Hanalei Inn gives you access to restaurants and a beautiful beach that are within walking distance from the Inn. Also within walking distance from Hanalei Inn (a 10-minute walk), there is a shuttle you can take to AND from Haena State Park (the beginning of the trailhead) which requires reservations ahead of time. If you have extra clothes you aren’t bringing with you on the trail, Hanalei Inn can provide luggage storage while you’re on your trek!
click here to book at Hanalei Inn

PRO TIPS
Ubers can be VERY expensive from the airport to Hanalei Bay or Haena State Park ($100-200) so the public bus is a good option if you have the time.
It is much easier to get a shuttle pass than it is to get a parking pass (these are more competitive to obtain) for your rental car. Rental cars can also be very pricey on the islands (especially if you’re not using it while you’re on the trail!).
Public buses do not run on Sundays so be mindful of this.
Haena State Park entrance (beginning of the trailhead) does NOT have cell service so getting back into town can be tricky, which is why I recommend using the shuttle system and not relying on a rideshare service!
Transportation to Trailhead
Your options are to either rent a car and get a parking day pass for the parking lot or to book a shuttle that takes you to AND from the trailhead. I recommend the shuttle due to the limited capacity of day parking permits and it’s more cost effective. Shuttle times start as early as 6:20 am which means you can start hiking by roughly 7:30 am. Shuttles run every 30 minutes and make it convenient. The shuttle can even take you back to Hanalei when you get back from your trip!

shuttle routes
Kalalau Itinerary
Mile 0
Before you start, this will be the only bathroom with running water on the entire trail so it’s best to take care of business and make sure your water is good to go before you hit the trail!
Mile 2 first river crossing - Hanakāpī‘ai Stream
Depending on the time of year, these river crossings can be high & it may be in your best interest to switch out of hiking shoes to avoid a dreadful walk in wet shoes. Hiking up to Hanakāpī‘ai waterfall is an option after this river crossing. I love Hanakāpī‘ai waterfall but it does add an extra 4 miles roundtrip so I suggest saving it for on your way back. Most day hikers only make it as far as the beach or falls so once you’ve continued on, the crowds will thin out.

Hanakāpī‘ai Stream

Hanakāpī‘ai Beach & Falls
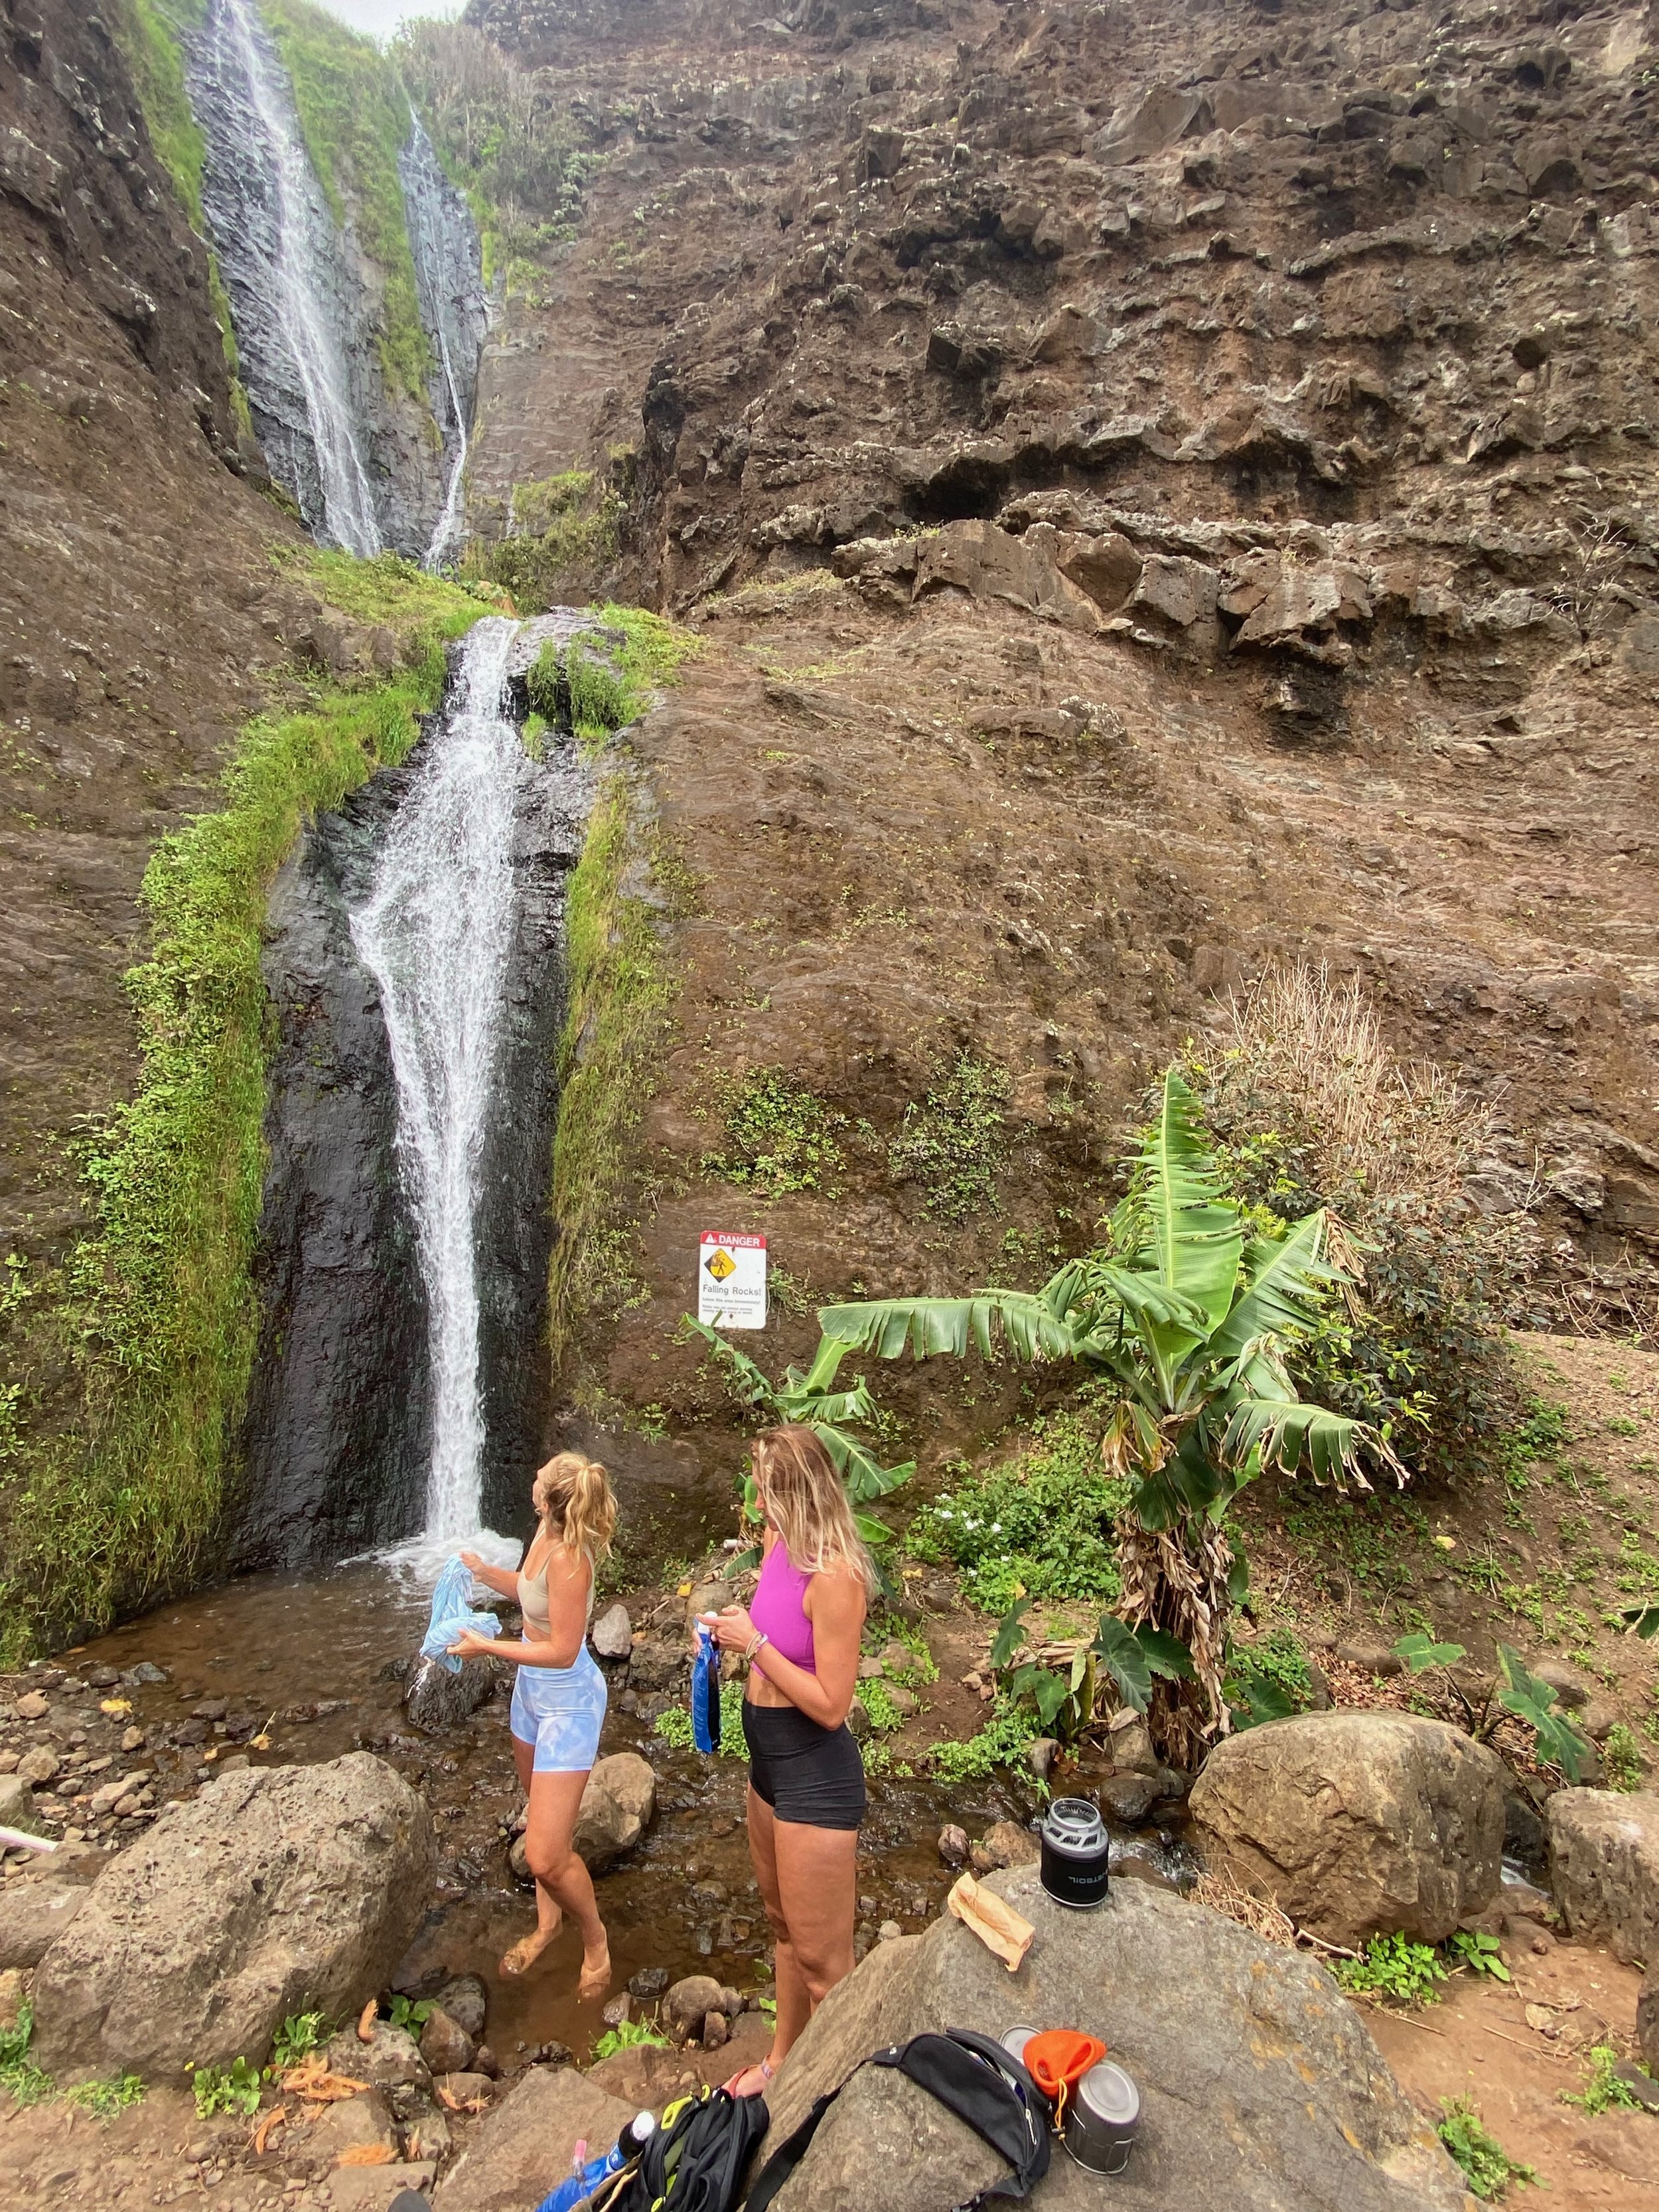
Mile 6 river crossing & campground - Hanakoa Stream
Hanakoa stream tends to be a smaller stream and it has never required me to remove my shoes. If you’re feeling too tired to keep going, this is the only campground before Kalalau Beach. Keep in mind this is the half way point and it doesn’t get easier after this point. There is a waterfall that only takes you 1 mile roundtrip off trail if you’re interested in this. In my opinion Kalalau Beach is incredible and worth it to keep going and you can enjoy these extra waterfalls on the way back.

Hanakoa Stream
Mile 7/8 Crawlers Ledge
This notorious section of the trail gets its name from the treacherous ledge overlooking the ocean. Over the years it’s been made wider so in my experience it wasn’t as scary as anticipated. HOWEVER, during the rainy season, it can be hazardous when you add rain and wind so I would still tread with caution.


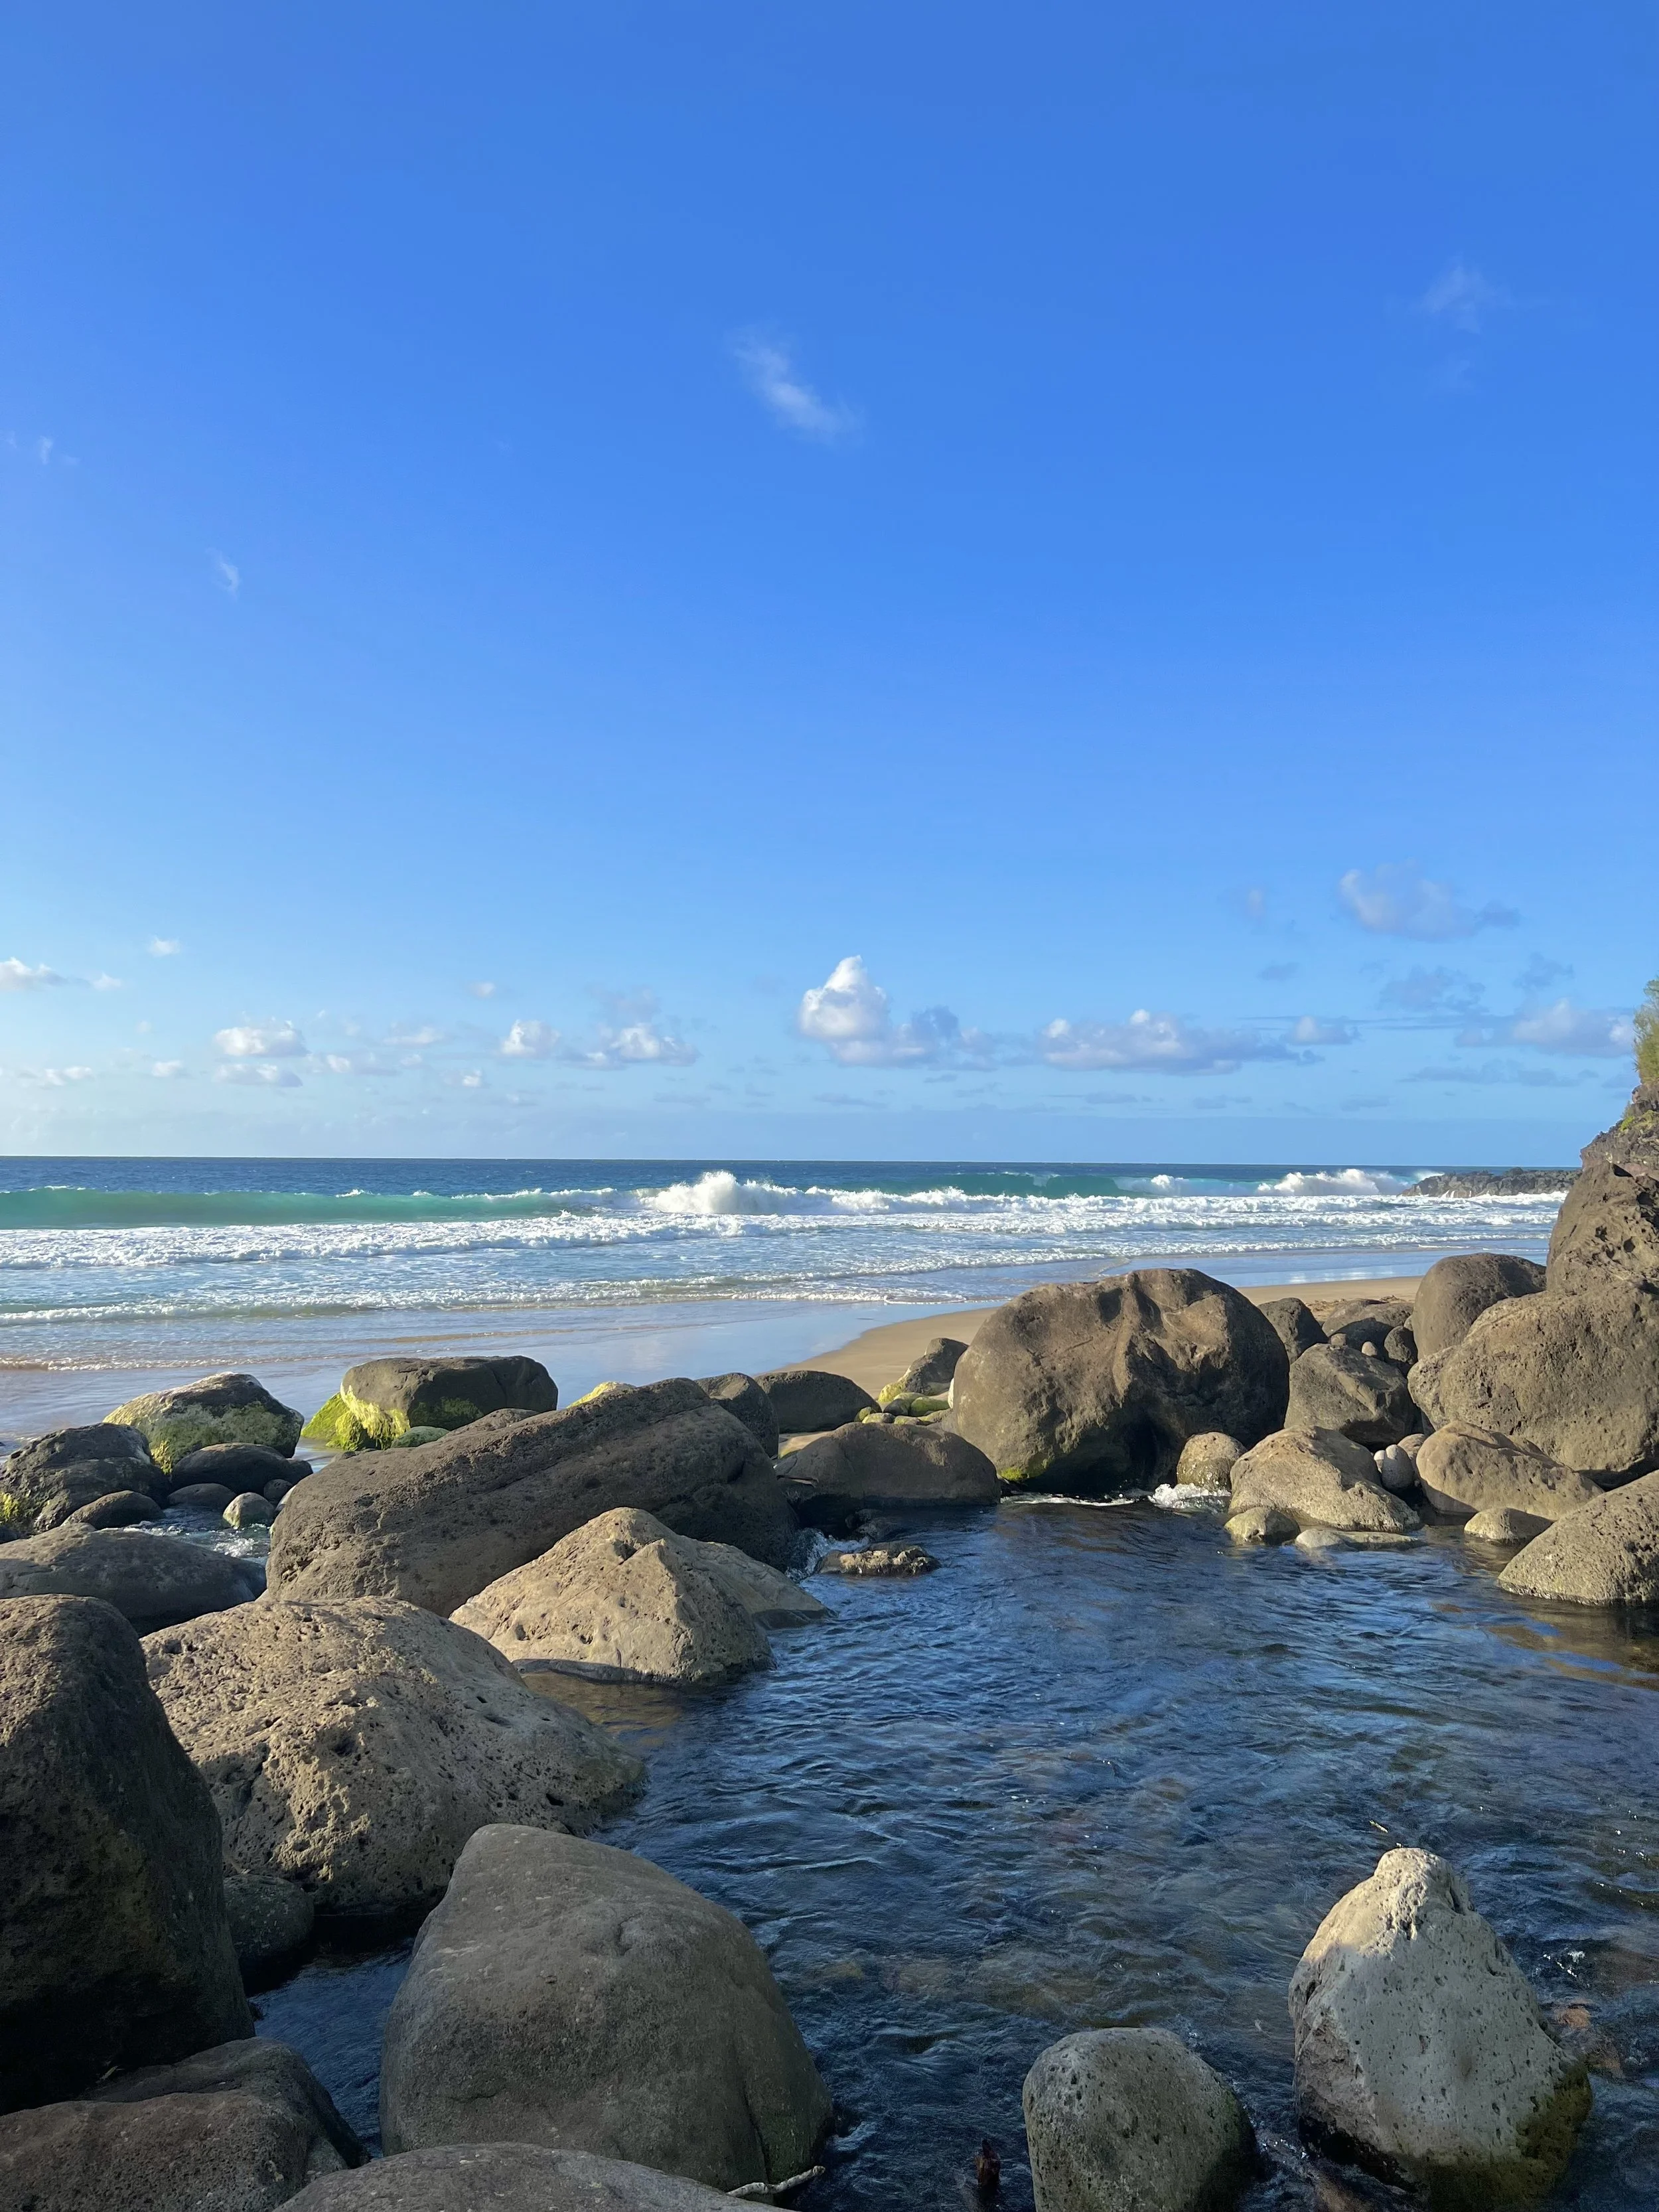
Mile 11 Kalalau Stream
This stream typically requires a rock hop or shoe removal- however, you are SO close to the end of the trail and you could just wear your camp shoes after you cross if you’d like. I prefer to fill up all my water here as the stream is stronger and typically flowing more abundantly than the waterfall on the beach.

Kalalau Stream
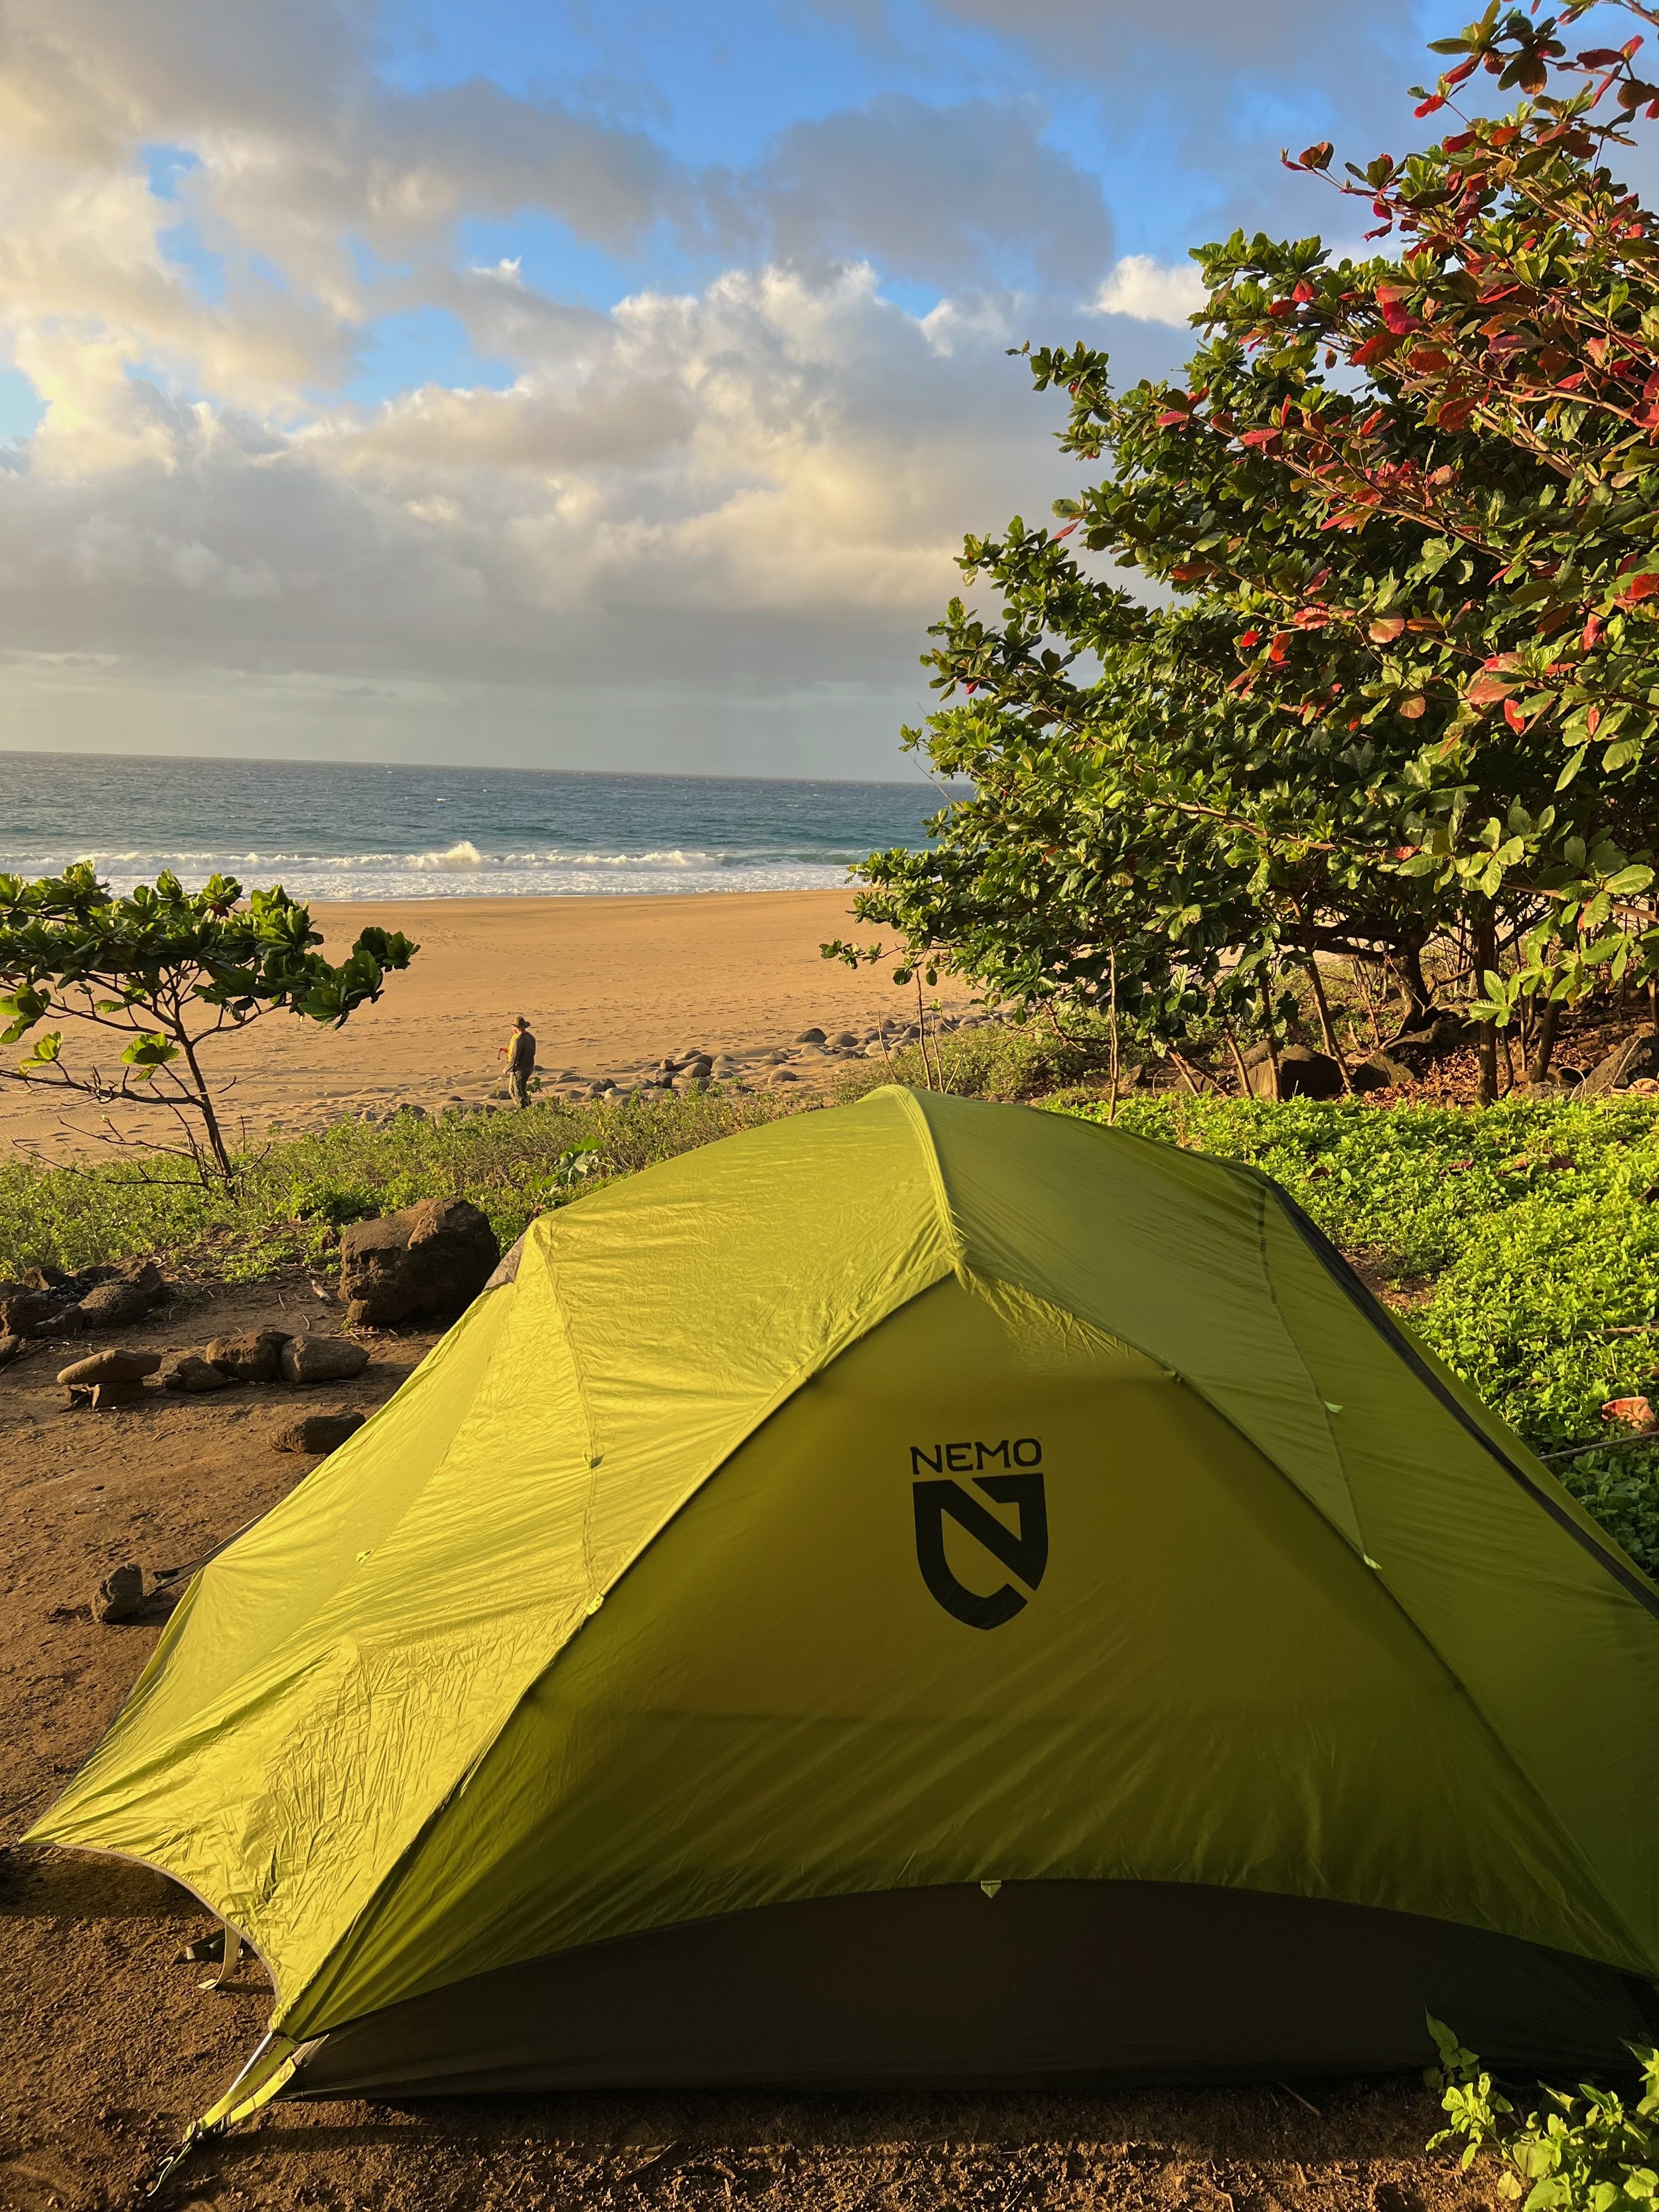
Mile 11 Kalalau Beach
YOU MADE IT! There should be plenty of options as far as camping along the trail. I’ve seen some people camp on the beach however, the campgrounds are more suited for tents to protect from wind and rain. There is a waterfall at the very end of the trail you can rinse off and fill with water. Soak in the beach and your time in one of the most magical places on the planet :)


PRO TIP
Keep your eyes peeled for wild fruit all along the trail! We spotted pineapple, mountain apples, Hawaiian lilikoi, Jamaican lilikoi, mango, guava, coconuts, tomatoes & kale.

Kalalau foraging